Plywood Rack Plans - Tips From Woodworking Experts
Plywood wine rack designs are very popular with some wine enthusiasts because it comes in standard sizes, and is significantly less expensive yet sturdy and sturdy. There's rarely a issue with shrinkage or warping.
But working using plywood can be difficult at times. Woodworking experts offer their tips and
suggestions for buying the right plywood, cutting it and staining it. Check out
these suggestions if you want to construct a stunning and durable wine rack.
1) Tips On Buying Plywood
Plywood manufacturers inTelangana are
always under pressure to keep costs low. Quality is usually the first thing that is
sacrificed. When you purchase plywood, examine the face
veneer when it is going to be exposed. The grain
should look like various pieces of wood that are between 6" or 8" in
width. Each piece must appear to be a reflection of the
preceding one. This is a sign of quality veneer. This kind of
plain-sliced, book-matched veneers are more expensive however, it's worth the
cost if you are looking to create a stunning wine rack.
Another thing to think about is the general smoothness
and flatness. Despite its
reputation for being flat it is common for plywood sheets to contain some
amount of bow, but it ought to be very minimal. Remove a sheet
from the stack and look at an extended edge. If the sheet
is severely bent or warped and twisted, don't purchase it, as it could indicate
an issue in the layer that is the core.
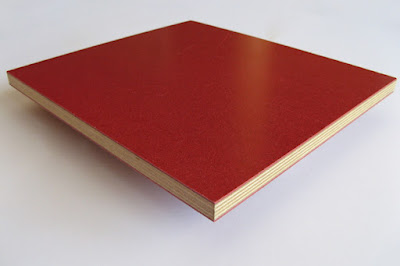
The third aspect to consider is how the edges are
constructed. Plies with more
are generally superior while hardwood's cores tend to be more durable than
softwood. Additionally, the connections between layers
must be straight, smooth lines. Also, the grain must be straight and
even. Don't choose sheets that have voids knots, checks,
or knots around the edges because you are sure there will be a lot more inside
the sheet.
Take a close examine the edge of the veneer's face to
determine its thickness. If the
thickness of the veneer is not evident, the veneer is likely too thin, and you'll
have difficulties sanding or finishing.
2) Tips On Cutting Plywood Without Splintering And Tearing
Plywood sheets can split and chip when cut using a
powersaw. To avoid having an unattractive edge, make sure
you use a sharp, appropriate blade when cutting plywood. Make sure
the top side of your lumber is closer to the edge that the blade. If you're
employing a table saw, then the left side should be facing upwards. If you're
using a hand-held circular saw the blade should be in the downward direction.
Attach an edging strip on the two sheets directly across
cutting line. Make sure
that your saw is running at maximum speed prior to making the cut by pushing
the sheet at an even, steady speed throughout. The masking
tape should be removed when you are finished cutting.
3) Tips For Finishing And Staining Plywood For A
Decorative Finish
Sand the plywood grain lightly using 80 grit of
sandpaper. It is then following by 100 grit Sandpaper. Apply an opaque or semitransparent stain. Paint can
also be used and finish it with the use of a clear topcoat.
Be aware that staining the plywood, sheets with synthetic
or wood repairs are not able to take staining as well as surrounding wood and
cause a different color. To avoid
this, you must choose a paint or stain with an opaque finishing when you are
using plywood that has synthetic repairs. Southern
pine plywood usually is less damaged and has smaller repair options that
Douglas fir.


Comments
Post a Comment